Customer's Guide Page

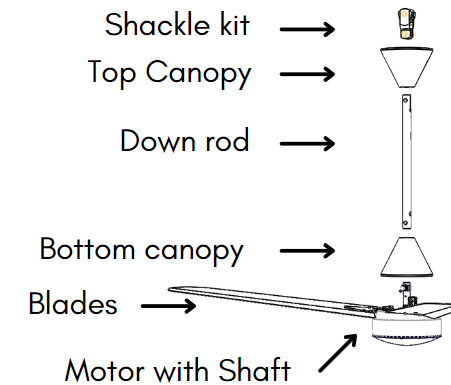
Included in this Package
Installation Precaution
Bypass or eliminate the regulator from the power supply before installing the Halcyon fan for better performance.
Installation Steps (No Regulator required)
-

Step 1
Open the box and carefully remove the motor. Place it on a soft surface to avoid scratches.
-

Step 2
Insert the canopy into the down rod and securely attach the shackle kit to the ceiling hook by using the nuts, R-Pin, and screws provided in the box.
-

Step 3
Align the holes on the blade shank with the motor holes. Securely fasten the blades with the bolts and washers provided.
-

Step 4
Insert the bolts to assemble the shaft and down rod. Insert the washer, nut, and R-pin in the sequence depicted in the illustration below. Pull down the canopy to cover the connectors.
-

Step 5
Please ensure the height of the fan from floor and ceiling is as per the depiction.
-

Step 6
Connect the phase and neutral wires to the two terminals of the fan irrespective of the wire colors. Adjust the canopy as required.


Operating Your Fan
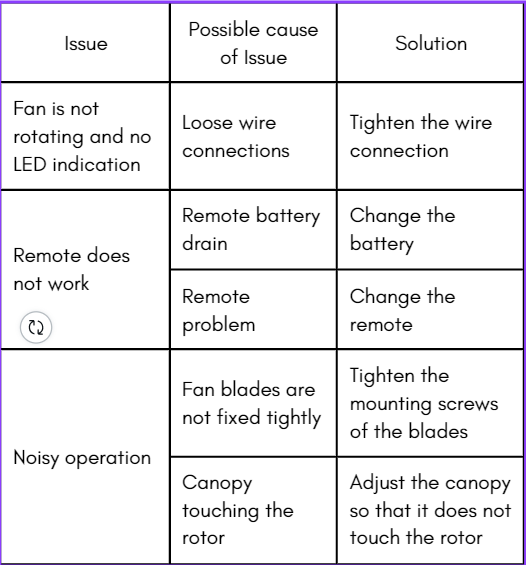
Trouble-shooting Guidelines
These are some possible causes and their solutions which can help you solve the problem.
Didn't fix it? Don't worry, we are here.
You can contact us at: +91-8050894126 or mail us at contact@emfluxmotors.com and we will get back to you.